Hi folks!
I’ve seen the question pop up frequently, so I wanted to give an answer to it and wrote this guide. There are actually a few different ways to go about this, so let’s get into it.
A few disclaimers
-
This is just a packing/unpacking guide, not a full mod creation tutorial, so don’t expect too much.
-
This guide is written for Windows users. Some things may work similarly on Linux and MacOS, but I can’t vouch for any of it. Little edit: Here is a short guide for Linux and MacOS, going the command line route. Thank you, @anon68621330 for this.
-
And finally, something I didn’t even think of mentioning:
General
Several games use the .pak extension for their asset files. The problem is that these files are not all created equally, and Starbound is all alone with its type of .pak files. Therefore, only information specifically for Starbound .pak files is valid for Starbound mods, and .pak’s from other games have no relevance here whatsoever.
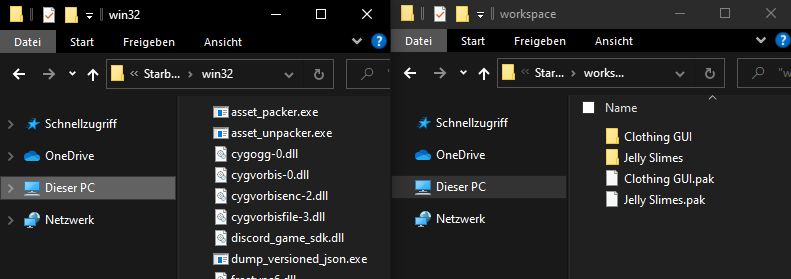
Thankfully, every Starbound installation comes with all the tools necessary for packing and unpacking the asset files. For Windows users, they are located in the win32 subfolder of your installation, right next to your storage, mods and other folders.

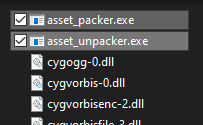
These two programs,
asset_packer.exe and asset_unpacker.exe are all we need for packing and unpacking. But they are written as command line tools, so just starting them like that will be no good. If you are comfortable with a little typing, check out the “Via Command Line” section. Otherwise, there is a “Drag And Drop” section, using a rather hidden Windows feature to make things simpler.
Preparation
Good preparation can save a lot of hassle down the line. In this specific case, it would be best to create a separate “workspace” folder somewhere to tinker around with the mods. Create it, open it up, and keep the window around for later. It may come in handy in more ways than one.
Another handy window to have around would be the win32 folder mentioned above. Open it and keep it around as well.
Via Command Line - The Way It Was Intended
TD;DR For CL Veterans
If you are familiar with using a command line, it suffices to say that both the packer and the unpacker take their arguments in the form <program> <source> <destination>, so e.g. asset_packer src dst.pak or asset_unpacker src.pak dst. Both give usage info when called without arguments, just in case. Both programs also override any existing files with those they create, without prompt or warning, so beware.
Command Line - The Detailed Explanation (Long!)
First things first, open the command prompt: Hit the key combo [Windows]-[R], type in cmd into the small prompt that appears, and hit [Return]. You should be greeted with a black window with a few lines of grey text. That’s the command prompt. (Don’t mind slight differences in wording, I have my language set to German.)

To make life a little easier, we’ll create a little shortcut to the win32 folder. (This shortcut is very temportary. It only work in this one command prompt window and will disappear again as soon as we close the window.)
If you have the win32 folder open from the preparation earlier, switch over there for a second. At the top of the window, right above where the files are listed, there is a “breadcrumb bar”, listing which subfolders you are inside right now.
![]()
Click on the far right of this bar, behind the last breadcrumb. The whole bar should change into a text field with everything selected right away. Hit [Ctrl]-[C] to copy the contents. (If you accidentally type something, click anywhere else to get the normal bar back and try again.)
![]()
Now go back into your command prompt and start typing. Start with set path=%path%;, then hit [Ctrl]-[V] to paste the thing you just copied. Hit [Return] to send the command off. Our shortcut is now created.To test if things work, you can try typing just asset_unpacker and hit [Return] again. If things went well, it should give you a message starting with “Usage: asset_unpacker”.

Now we are ready to use the packer and unpacker.
Open the folder you want to work in with the file explorer and copy the path from the breadcrumb bar like above. Then type in cd ", paste your copied path, close the quotation marks ", and hit [Return] again. Now you should see that the part of the prompt in front of where you type shows the new path instead. If nothing changed, your target path may be on a different drive, indicated by a different letter right at the start. Just enter the letter you need, followed by a colon, and hit [Return] again.

Now that you are there, you can use the packer and unpacker as you please.
If you have a mod you want to unpack, type asset_unpacker, (space,) the file name of the .pak file, (space,) and the name for the folder you want the unpacked mod to appear in.
If you have an unpacked mod and want to pack it, use asset_packer, (space,) the folder name where the mod is in, (space,) and the name of the packed file to create, including the .pak extension.
A few notes on this:
-
You can save yourself a bit of typing by using the autocompletion on file and folder names: Type the first few letters (or even nothing at all) and hit [Tab] to get the first matching result. Hitting [Tab] repeatedly goes through the available options, while a little error sound indicates there are no matches. Sadly, this doesn’t work for the “asset_(un)packer” part at the beginning.
-
If any file or folder name includes spaces, you need to put that name in quotation marks to tell Windows that all these separate words should be used together:
BigFattiesis fine, but"Big Fatties"needs quotation marks. [Tab]-completion automatically adds the quotes when needed.

I would suggest keeping the command prompt around while you are working to spare yourself redoing the setup over and over again. Once you close the prompt, most of what we did here is lost. The main exception is of course the new files and folders created by the packer and unpacker.
Apart from that, happy typing!
Via Drag And Drop - A Hidden Windows Feature
For this one you really need the two windows mentioned in the “Preparation” section. Arrange them side by side on your screen.
Both packing and unpacking this way requires you to prepare a destination for the results. In other words, you always need a folder and a .pak file, no matter which way you go.
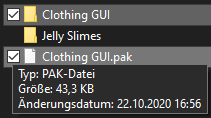
If you want to unpack, create a new folder inside your workspace folder.
If you want to pack, create a new text file and rename it to have the extension .pak instead of .txt. The packer doesn’t care about the extension, but Starbound itself does.
Apart from the extension, the names of the folders and files do not matter, so you can be creative there.
Now that you have both a folder and a .pak file, select them both in the explorer. (If you don’t have the checkboxes for the selection, you can add items to the selection by holding [Ctrl] while you click them.)

Here comes the part that requires a little precision. We will drag-and-drop these two things somewhere else, but it’s important which of the two your mouse is over when picking them up. If you want to unpack, hover over the .pak file before clicking. If you want to pack, grab the folder instead.
Now, with both things at your cursor, drag them over to the other window and drop them on either asset_packer.exe or asset_unpacker.exe, depending on what you want to do. The tooltip should read “+ Open with <program>”. (I’m using a German Windows installation, so I have some different text on my screenshots.)

As you let go, you should see a black window pop up and disappear again. It may only flash up quickly or stay around for a few minutes, depending on how big the mod is you are (un)packing. As soon as that window is gone, the deed should be done. Either the .pak file is now filled with the mod contents (if you packed), or the folder is (if you unpacked). If nothing happened, you may have picked up the wrong file.
Anyway, this is all there is to this. Happy packing!
For those that are wondering: This drag-and-drop with the “+ Open with …” is doing the same thing as we do manually in the command line section up above, only that Windows automatically figures out the full file paths to make things work without any funny shortcuts. The distinction which file is picked up for the drag tells Windows which one to put first into the list of arguments for the program.
Bonus: Packing Helpers - For The Laziest Of People
Packing Helpers.zip (742 Bytes)
For those that still think this is too much work, I’ve put together some little scripts that they can use. They only need a little bit of one-time preparation to use.
Download the scripts, put them into your workspace folder and open up setPath.bat via [Right-Click] → “Edit”. There is a single line in there, and for most people that should already be the correct one. To make sure though, find your Starbound installation and the win32 folder within. At the top of the window, click on the far right side of the “breadcrumb bar” to highlight the contents. [Ctrl]-[C] to copy the path.
![]()
▼
![]()
You can close the win32 folder now. Go back to where you edit setPath.bat, and replace everything right behind the semicolon ; with what you just copied. Save and exit.
![]()
Congratulations! These preparations have to be done only once, so you are good to go now.
pack.bat and unpack.bat work very similar to asset_packer.exe and asset_unpacker.exe in the “Drag and Drop” section explained above: Take file and folder and drop them on the corresponding .bat script. (These scripts just redirect to the proper packing programs.) There are two differences, though:
-
I told the script to keep the command window open in case something bad happens, so you can at least have a look at the error before it pops out of existance again.
-
I managed to make the scripts work with just one folder/file to work with. If you drop just a folder onto
pack.bat, it will take the folder name, append.pakto the end, and use that one as name for the packed file. Similarly,unpack.batcuts off the.pakto figure out the folder name if you don’t give it one.
E.g. droppingBig Fatties.pakonunpack.batwill create the folderBig Fattiesautomatically.
Update: These scripts can now be used if they aren’t in the same folder as the mods you want to (un)pack.
Closing notes
I hope this ‘little’ post helps people out at least a bit, and also reduces the amount of questions in other places about this topic. Feel free to leave critique and suggestions for this guide and the little helper I provided, and feel free to direct people here in case they have questions.
Have fun and happy modding!