How goes the renders? I assume we’re not gonna get a wide shot of the restaurant but daang, is it large
1 Like
It’s going good! I think i am done with the first stage images (Might need to make more when i implement in renpy and find somethings missing) . For the restaurant specifically it is basically what it was before, except with chairs next to the big table and some more plants. In that specific screenshot i am using a wide lens to show off the room, ingame shots will not look like this likely. The rooms being bigger helps me with creating varied shots (I think, i am not a cinematographer)
I have also made a messy room in blender that i kind of wanted to show off, tried screwing a little bit with emission and i’m personally pretty satisfied with it.
Current Plan: I am mostly doing writing and bugtesting around stage 0 now. I will do this before starting to work on stage 1, since working through 2 stages of renpy python codeat once is a bit annoying to me, whereas the pictures are a bit more fun to make.
3 Likes
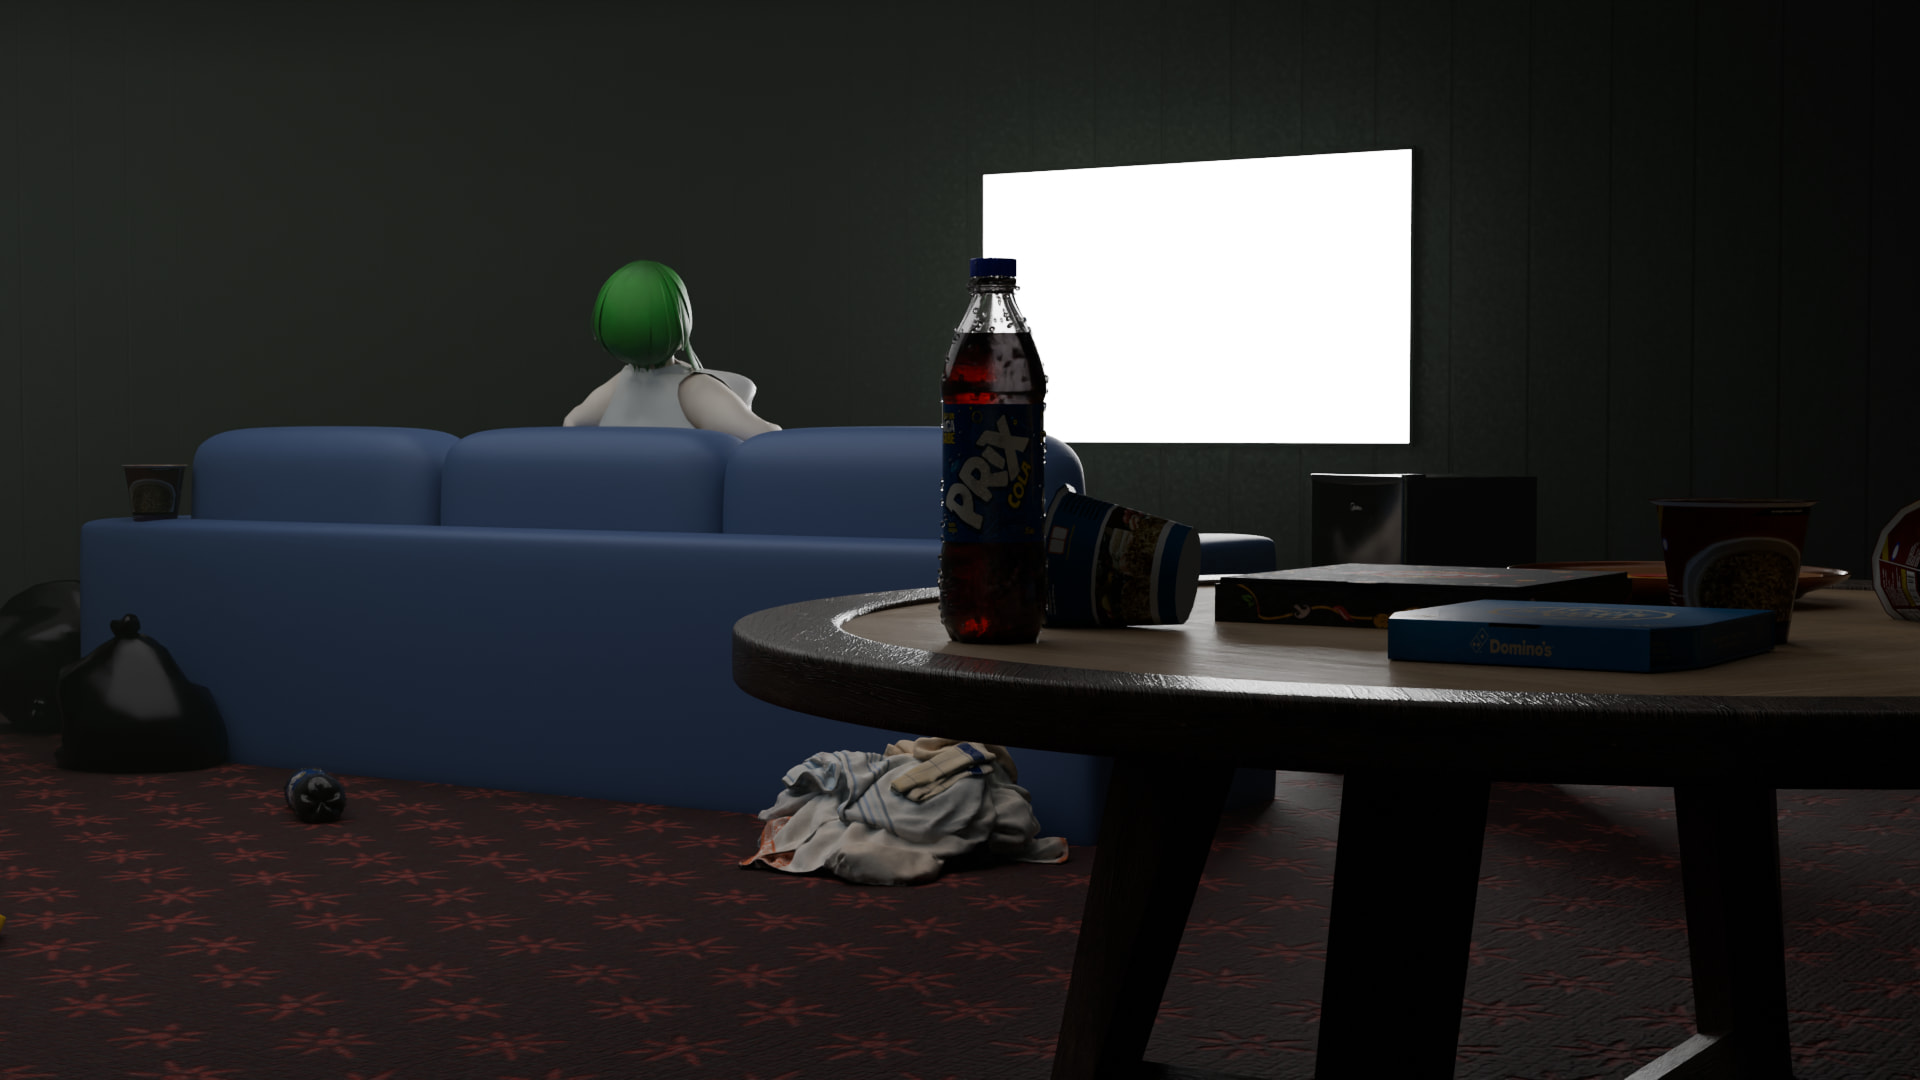
Its a pretty good shot for sure, funnily it does kinda give off almost an ominous feeling with how wide the room is. Good stuff though nice shot composition
4 Likes
This is will be great, I loved fill me up!
2 Likes
I’ve been kinda struggling to make the second stage weight stages look nice. When expanding there are burst seams. There are less vertices around the waist area and other important areas, which makes them look jagged when expanded. I’m gonna do stage 2 with these old models, just so that i have an actual game to show off, but i will probably try and either making my own models, or getting them from a different source when i continue afterwards. If anyone is itching to hear progress on that they can always ask!
Edit: This obviously means that there might be artstyle changes later down the line of course
5 Likes
Ooh please do show!!
1 Like
Actually, while i made that comment i have not had anything yet XD
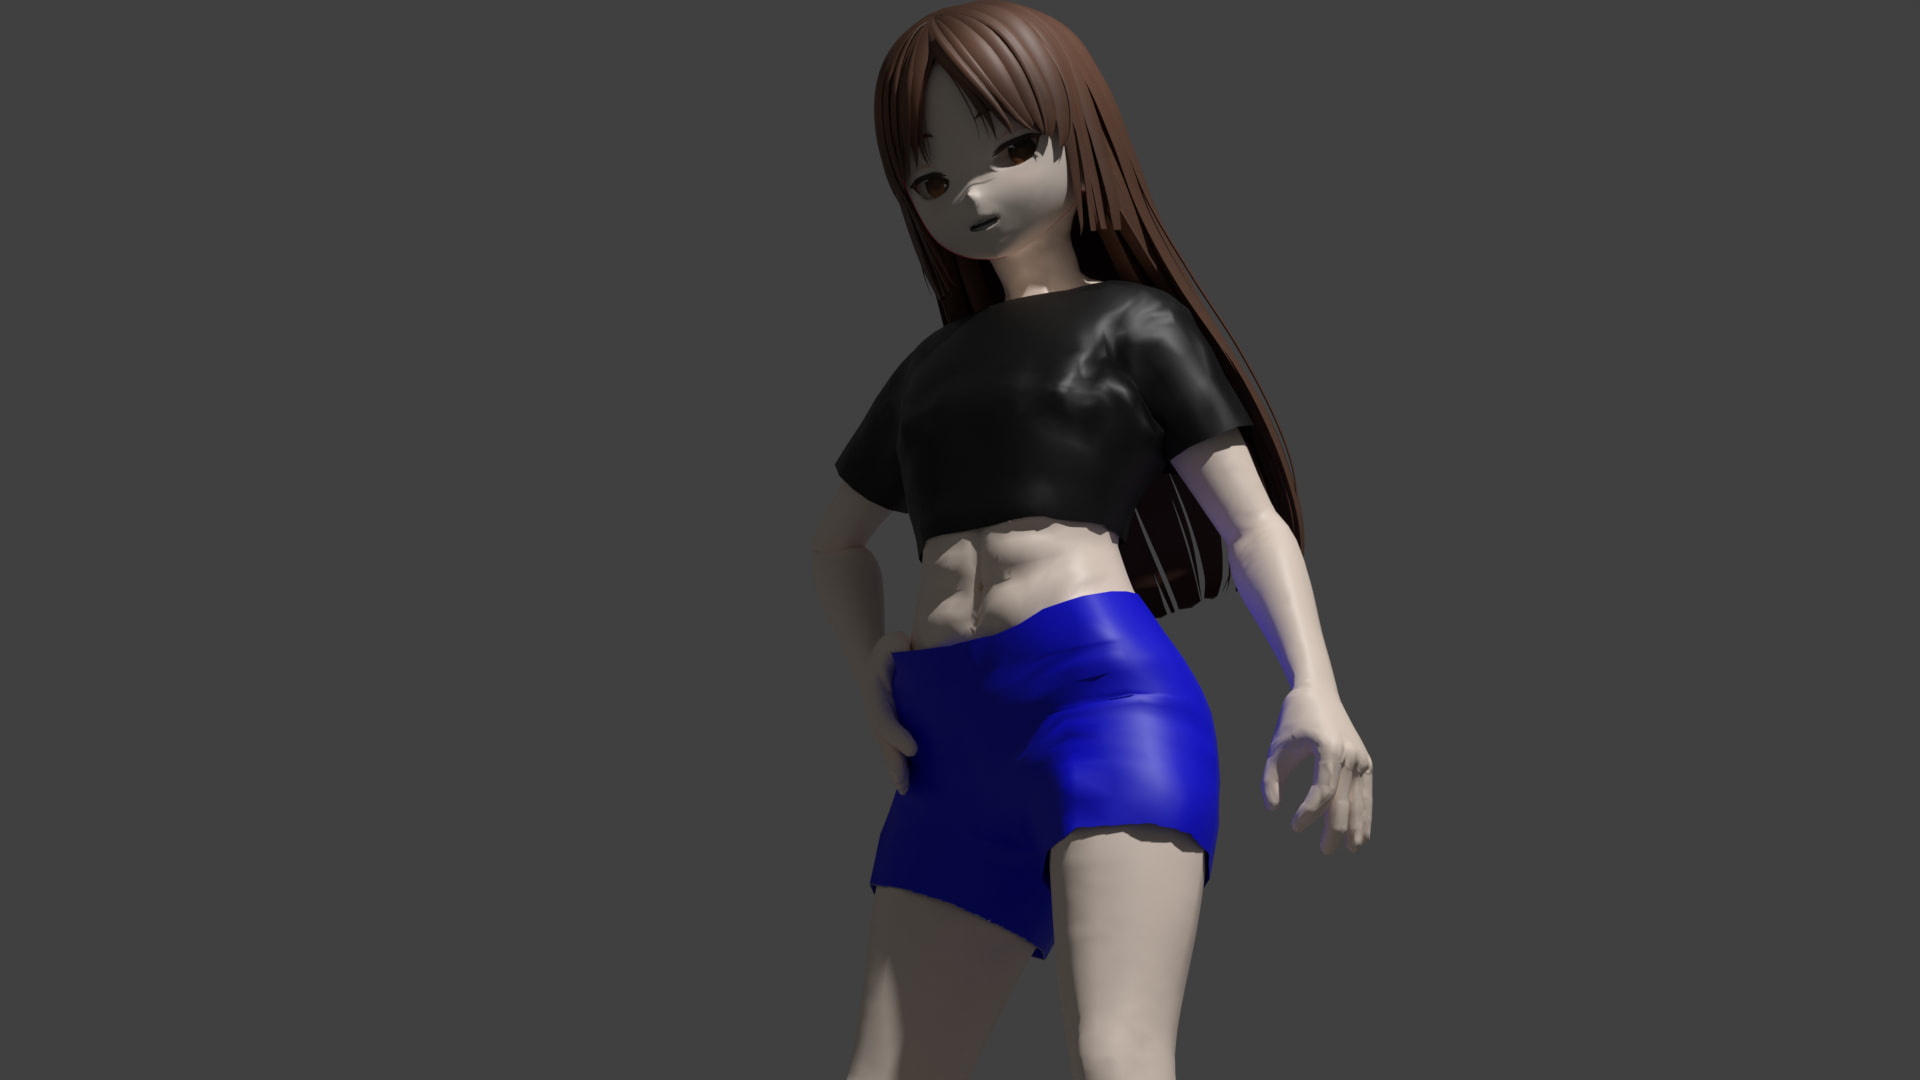
That being said i cooked up something real quick. It’s not a fat pic, since i don’t want to spoil the main part about the game, please understand X)
I was able to rework the models in a way i wanted. What might be hard to tell, but is absolutely important, is that the navel here is not textured, but instead sculpted and with shadows. If you never did anything in blender this might not mean much, but it essentially allows me to make proper deeper navels, and thus more realistic fat scultping. The additional vertices allow for more detail in the important areas too, which takes a load of my shoulders. There is still room for improvement of course. but this does remove a major hurdle in sculpt limitations.
5 Likes
Again though, the first version with stages 0 and 1 will be with the old models. The technical limitations are not such a big hinderance there yet, but i will remake parts of that eventually anyway as i get better to make the quality more consistent. You can still kind of see the limitations on Eris ‘s(Purple hair girl) belly - it IS just mostly spherical right now. Could’nt get proper sag with the lack of vertices before.
2 Likes
you gonna stick with the shading as it stands now or are you gonna go for the cel shaded look akin to the source inspo?
2 Likes
Gonna stick with this one for the foreseeable future. I don’t see anything wrong with it to an extent that i’d feel i need to change it
I like the claymation look. It takes the quasi-comic vibe BoboTheSecond used to a new level. Distinct but clearly in tribute.
1 Like
Hey! Can you speak a bit more about your modeling process, maybe there’s some people familiar with your tools that can help? I’ve done some Blender work recently, but not sure if you’re editing them in something else.
Sure i can! I will explain it as though you don’t know anything about blender even though that might not be the case. It will be a bit of a yap sesh, so i hope you are prepared. I’m also still learning and a lot of these strategies are probably suboptimal - but they worked for me. It’s probably important to say as well, but the blender version i am currently using is blender 5.1.2
The models are vroid characters. Vroid is a free character creator program that you can download and export characters with. To import them to blender you need an add-on, i forgot its name but you can just download it from blenders extensions tab if i recall correctly. After importing them i simplify the shaders. They do have a natural anime esque shading. That made them look screwed up in mirrors somehow, so i just replaced it with a simple freebsd node with a texture in the shader editor until now.
I first connect all of the parts together - the clothes and the character, by clicking on them in object mode with left click + shift and ctrl + j to join them. This links everything up to the premade vroid armature, so when you start posing and move an arm the clothes follow the movement of the bodyparts.
After that i connect the clothes vertices (A shirt is actually made of two parts in vroid, so you gotta select and connect them in edit mode). After all of the clothing meshes are connected i seperate them so i can sculpt them independently from each other and the main body mesh. I do this by selecting f.e. the shirt in edit mode and pressing a, which highlights all of the connected vertices. Which, if everything went well, will be the entire shirt and nothing else. I then right click and seperate the vertices. Seperating them from the main body mesh does NOT seperate them from the armature, so you do not have to re-join them to pose - It also means that you can make them invisible seperately!
Before i would usually get into sculpting from here, but from now on i will do it differently. The vroid models use triangle meshes - which is not great since subdivision does not really know how to deal with that. I’m guessing it cannot accurately generate where the other vertices go. I use x-ray in edit mode to select the relevant vertices, the relevant parts of the body - in this case everything from the neck down. Now, you want press alt + j to make the vertices into squares. that works without breaking the textures. but using subdivide breaks it, since the textures are aligned to the vertices, so if you generate more it does not know where to put the textures and it breaks, at least from my experience. After that you gotta assign a material to the mesh, so it is actually the color you want. you can take the same color as the face.
If you don’t know, subdivision makes a mesh more complicated - it adds more vertices. For games you usually don’t want your model to be too complicated because the character is being rendered in real-time - in renpy it is a different story. The models are only being rendered in blender, and the pictures are the only thing used in the game (Well… that and animations which are just sequences of images anyway. I tried to do animations before, but i still need to increase my power level before i can make it work and have it look good. And possibly download an add-on like jigglemaker lol).
As for the sculpting itself, i used ExtrudedSquared’s youtube video as a crash course (https://www.youtube.com/watch?v=zwAtrqUBrMk) TLDW: i make an additional shapekey for a weightstage. that way i can manipulate that specific weight stage without screwing up the original model. Like Squared, i make use of the blob tool for expansion. This is just work about skill and proportions - i still need to get good at it personally, can’t give that many tips on that. but using a reference definitely helps. Also you should probably mirror x so that the sculpting changes are mirrored from one side to the other.
I hide the clothes so i can see the body and get to work. After i am somewhat satisfied with the mesh i turn the clothes back on and use the elastic grab modifier sculpting tool to pull the clothes in a way that it fits over the mesh. Adjustement on how they fit are being done manually by me, if there is a better way i have not found it. Shrinkwrap modifier did not really satisfy me in that respect. Once you are done scultping everything you just start posing - might need to make temporary changes through the clothes, as they can still clip through the mesh during posing.
Then i essentially play barbies playhouse with my models and snap some pics. And that is basically my entire workflow with characters in blender so far.
Edit: Hey there, i figured out how to deal with clothes clipping, with simulation! First, and absolutely foremost, make sure that the timeline is set to 0. Then set the mesh to have collision, and the clothes to have a clothing modifier in the physics tab. by pressing the bars on the very upper right of the physics tab you can set the presets, which spares a massive amount of time experimenting, please use these! For the shorts specifically make a new vertex group which would be the seam of the shorts - the reason we have to do this is to prevent the shorts from falling off! To achieve this we place the newly made vertex group (call it pantsSeam or something) and place it in the pin group slot - this is found in the “shape” subsection of the cloth modifier. This makes sure that that specific set of vertexes does not move. When everything is done i press spacebar so that the physics happen! After that i can pose the armatures without clipping, and thus without having sculpt adjustements for every new pose. you should only pose during simulation to avoid confusion for the clothes. Also, copying and pasting a pose id simulation is a bad idea from my experience, so be careful.
And speaking of simulation, i have also practiced a bit of animation using jigglemaker! I think it looks reasonably nice. I’m using mixamo and exporting my meshes with fbx. There you can have your armature made for you actually, and after doing so you can use preset animations. Those are a godsent, since walking is actually pretty complex, and difficult to make flow nicely from scratch. From my Testing, the jiggles are pretty nice, though i screwed up with the rig and the elbow is weird. This video has a great tutorial on it it anybody is interested: https://www.youtube.com/watch?v=Wsef3Ka1rmM&t=416s
5 Likes
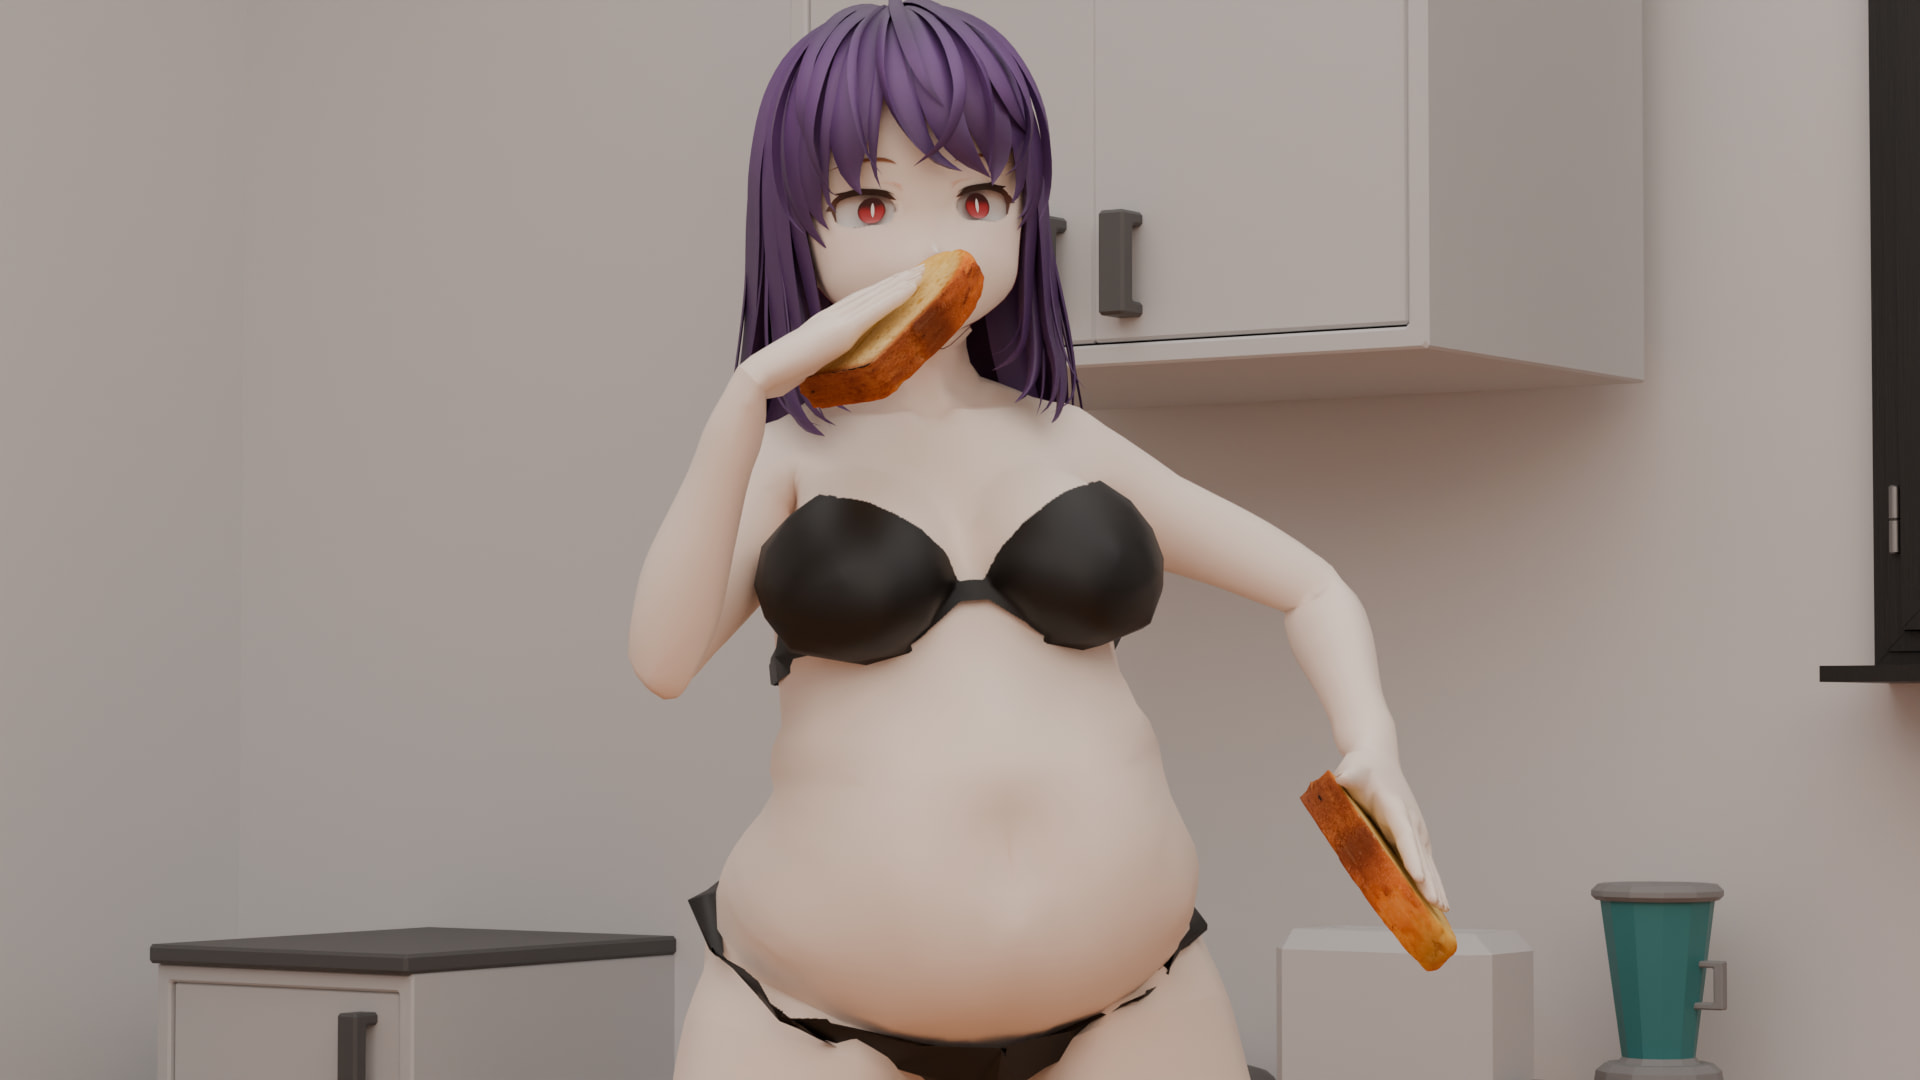
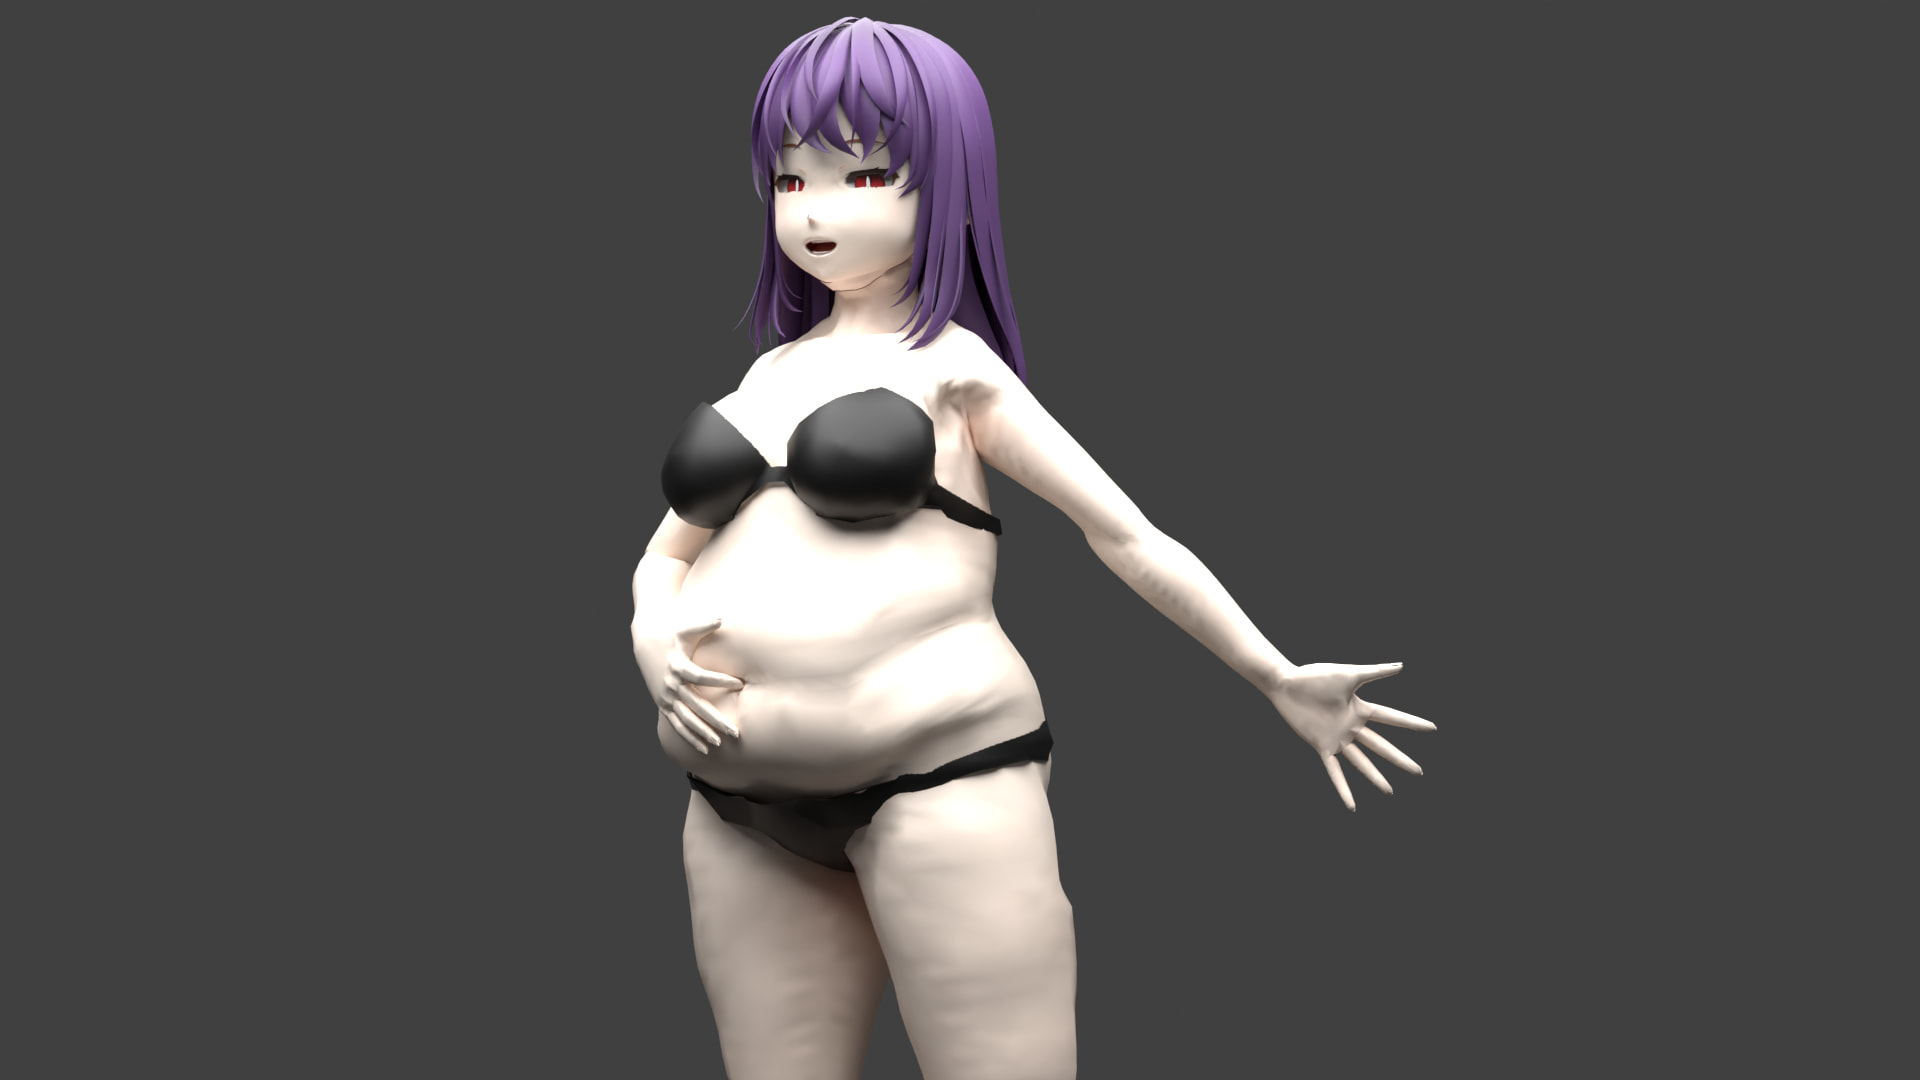
want to do a little compare to show off the difference. I’m gonna use Eris as an example here, since she starts off fat. Just to compare the higher detail one with a current ingame picture. Only thing i would still be dissatisfied is the skin looking kind of wrinkly, because of how the mesh catches the light
5 Likes
it honestly looks like lizard skin lol
1 Like
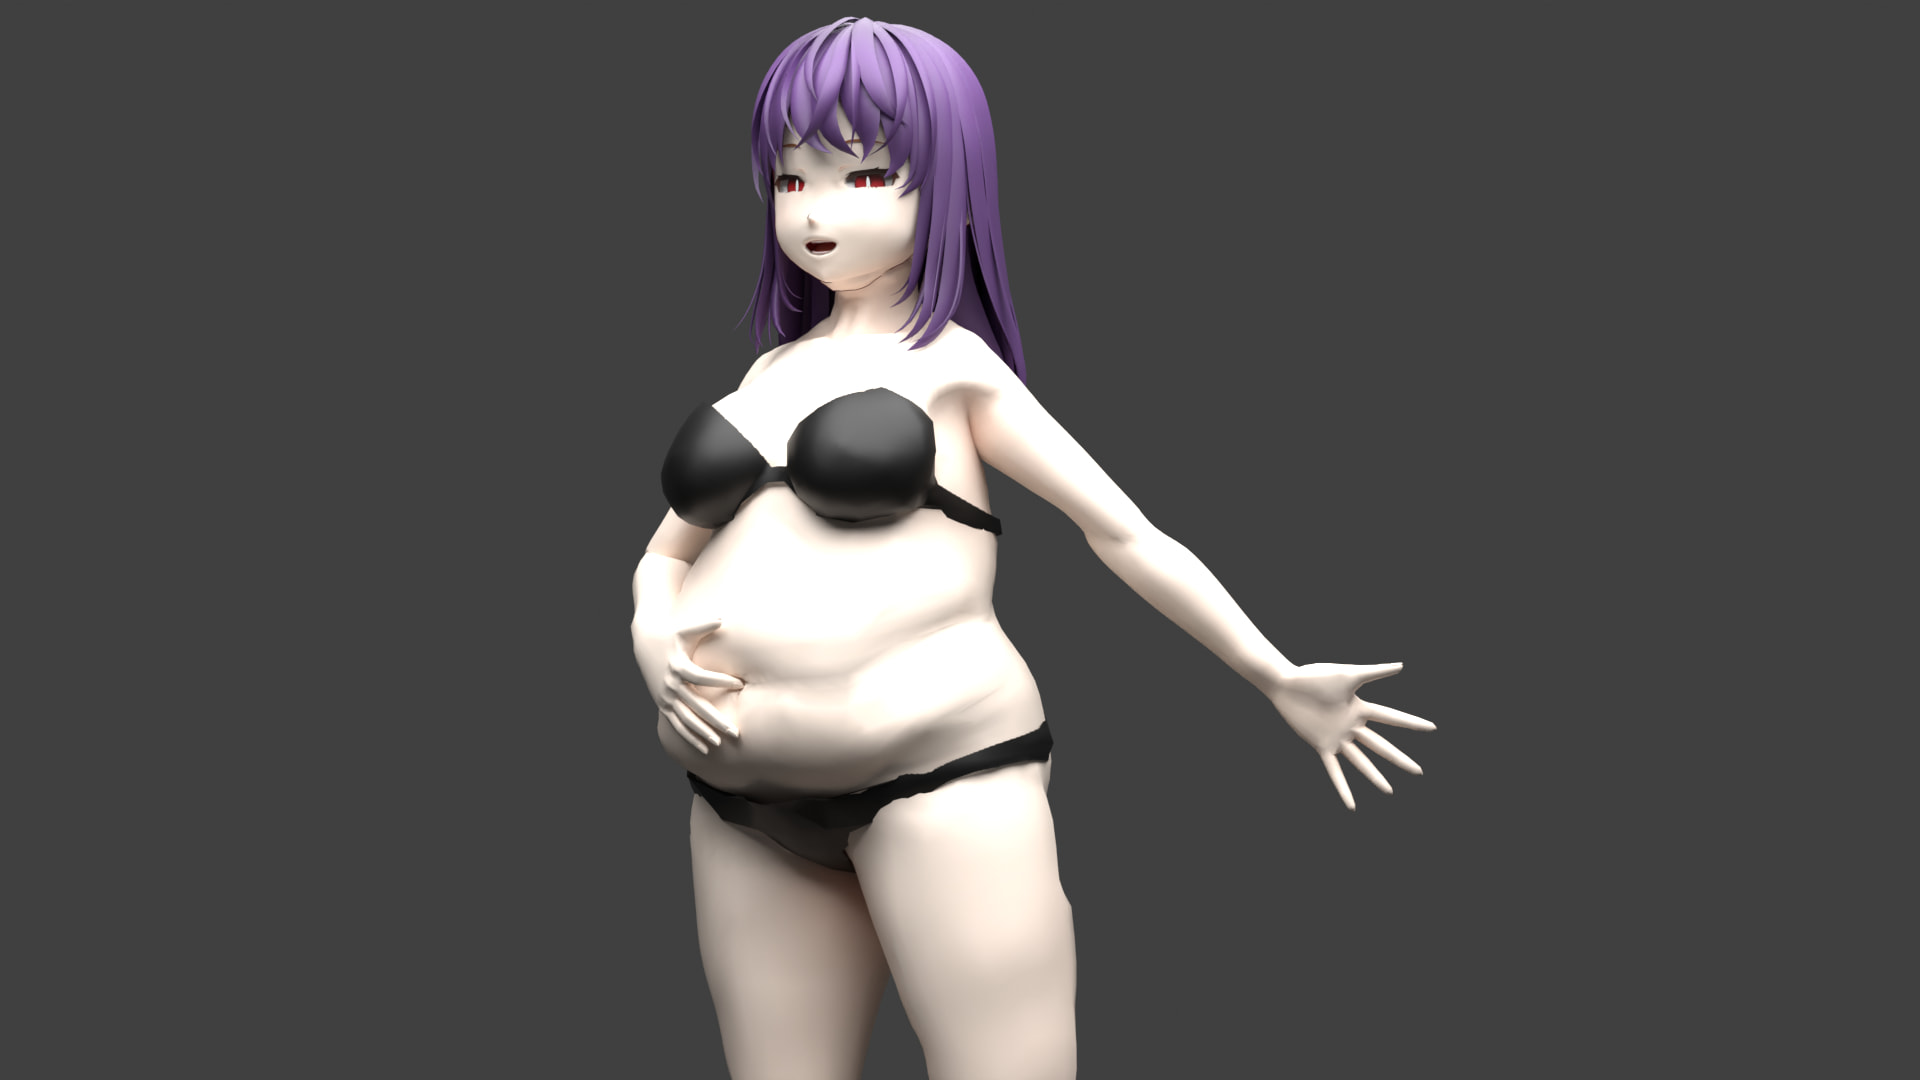
it could also be the lighting, you could try some warmer (more orange/yellow) light to make them look less pale. You may also want multiple scene lights to make them less shadowed. I think the cellulite looked good to me!
1 Like